





Payment terminal selection is often treated as a payment-provider decision. In a kiosk project, however, choosing the terminal is only half the job. The other half is deciding how that device will physically fit, connect, survive daily use, and remain serviceable inside the kiosk.
Poor kiosk payment terminal integration can create problems long before the first transaction is processed. A terminal may protrude too far from the enclosure, the card slot may be difficult to reach, contactless tapping may feel awkward, cables may interfere with a service door, or replacing the terminal may require dismantling the entire front panel.
These are mechanical and system-integration issues rather than payment-processing issues.
At AONKIOSK, payment-device integration is therefore treated as part of the kiosk hardware design. The terminal model, mounting method, user position, cable path, maintenance access, and enclosure structure should ideally be confirmed before sheet-metal drawings and tooling are finalized.
This guide explains the main payment terminal mounting methods and the engineering questions buyers should resolve before moving from prototype to production.
Start With the Exact Payment Terminal Model
The most useful information you can give a kiosk manufacturer is not simply:
“We need a card reader.”
It is the exact manufacturer and model number.
Payment terminals that appear similar in product photos may differ significantly in:
- External dimensions
- Rear housing depth
- Mounting-hole positions
- Cable connector locations
- Card insertion direction
- NFC antenna position
- Required installation angle
- Power input
- USB or Ethernet interfaces
- Ventilation requirements
- Service access
- Manufacturer-approved mounting accessories
That means a card reader bracket designed for one terminal should not automatically be assumed to fit another.
For example, changing the payment device after the kiosk enclosure has already entered production can require a revised front-panel cutout, a different internal bracket, altered cable routing, or even changes to the surrounding sheet-metal structure.
For custom projects, the safest process is to freeze the payment terminal model before the final mechanical drawing is approved.
If the terminal has not yet been selected, provide your kiosk supplier with the shortlist of devices being evaluated. The enclosure can sometimes be designed with a replaceable mounting plate so that future terminal changes do not require rebuilding the entire cabinet.
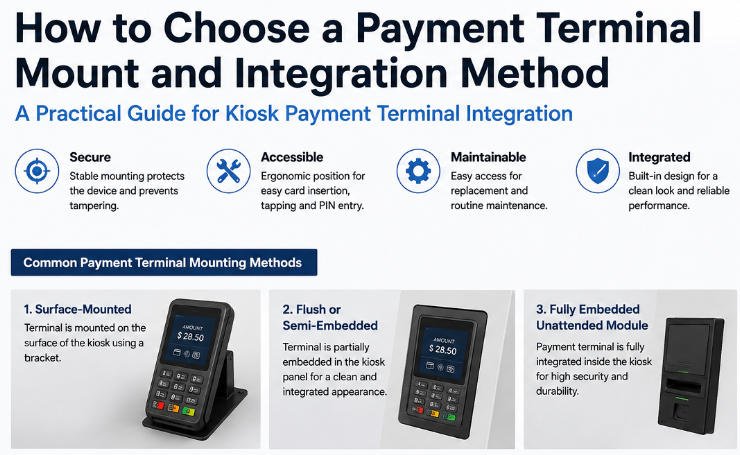
The Main Payment Terminal Mounting Methods
There is no single mounting method that works for every kiosk. The correct choice depends on the terminal design, deployment environment, service strategy, and user workflow.
1. Surface-Mounted Terminal
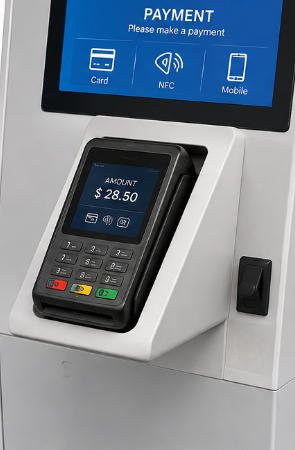
With surface mounting, most of the payment terminal remains visible outside the kiosk body. A bracket or mounting plate secures it to the front, side, or angled console.
This approach is common when using compact countertop-style payment terminals that were not originally designed as embedded unattended devices.
The main advantages are straightforward installation and relatively easy replacement. Technicians can usually remove the device without opening a large section of the kiosk.
However, a surface-mounted terminal also creates several engineering considerations.
The bracket must resist repeated pressing, card insertion, accidental impacts, and users pulling on the terminal. Exposed cabling should be minimized, and the mounting angle must allow customers of different heights to see the display and reach the keypad comfortably.
The enclosure should also prevent access to mounting screws from the public side wherever practical.
Surface mounting works well when terminal flexibility and field replacement are more important than creating a completely flush appearance.
2. Flush or Semi-Embedded Mounting
In a flush-mounted configuration, the payment device is partially integrated into the kiosk front panel. The user sees only the operational portion of the terminal while much of the body remains behind the enclosure.
This creates a cleaner and more integrated appearance.
It can also reduce how far the terminal projects into the customer walkway, which is useful for wall-mounted kiosks, compact ordering terminals, and narrow retail installations.
The challenge is precision.
The enclosure cutout, internal support points, bezel clearance, connector access, and terminal depth all need to match the payment-device drawing closely.
A small dimensional error can create visible gaps or make installation unnecessarily difficult.
For this reason, AONKIOSK normally recommends designing the mounting structure around the actual terminal drawing or physical sample whenever possible.
3. Fully Embedded Unattended Payment Module
Some payment devices are designed specifically for vending machines, ticketing machines, parking terminals, EV charging stations, and other unattended systems.
These terminals are intended to become part of the machine rather than being attached to it as an external accessory. Industry payment platforms also distinguish unattended terminals intended to be mounted inside self-service machines. For example, Adyen’s documentation for its S1U2 unattended terminal describes installation directly into the front panel of a kiosk or self-service machine.
This type of integration is usually suitable for high-volume unattended deployments where durability, security, and a standardized installation are priorities.
Depending on the device, the system may combine card insertion, magnetic-stripe reading, contactless payment, PIN entry, or other functions within one assembly.
The mechanical design should follow the terminal manufacturer’s installation requirements closely rather than relying on approximate dimensions.
Do Not Design the Card Reader Bracket in Isolation
A card reader bracket may appear to be a small component, but its design affects the entire front-panel structure.
A good mounting bracket should address at least five functions:
Positioning. The terminal must remain accurately aligned with the kiosk opening.
Load support. Users may press keys, insert cards, tap phones, or unintentionally lean against the device.
Anti-rotation. A terminal attached at only one weak point may gradually move or tilt after repeated use.
Serviceability. Technicians should be able to remove the terminal without dismantling unrelated components.
Cable protection. Connectors should not carry mechanical loads caused by movement of the terminal.
The surrounding enclosure also matters. A strong bracket mounted to a flexible sheet-metal panel can still result in an unstable payment device.
For projects requiring custom metalwork, AONKIOSK can adapt the enclosure and peripheral mounting structure through its OEM/ODM kiosk manufacturing service rather than treating the payment terminal as a last-minute accessory.
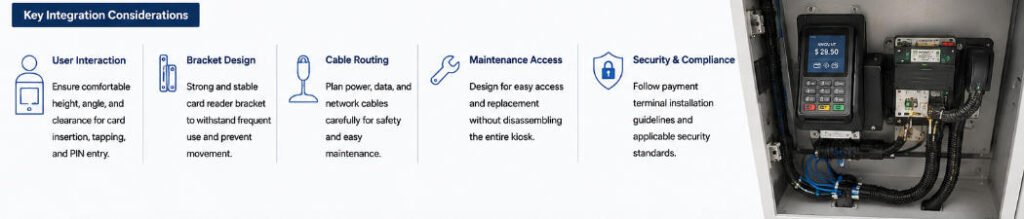
Check the User’s Payment Movement
Mechanical drawings often show where a terminal fits but not how a person actually uses it.
That distinction matters.
Consider the three basic physical actions involved in card payment:
Insert. Is there enough clearance in front of the chip-card slot for the user to insert and remove a card naturally?
Tap. Is the contactless area clearly accessible to a card, phone, or wearable device?
PIN entry. Can the user view and operate the keypad without excessive wrist or shoulder movement?
The payment terminal should also be positioned relative to the kiosk touchscreen.
If the touchscreen is at eye level but the card reader is very low on the cabinet, the customer repeatedly shifts attention between two distant areas. If the terminal is too close to the screen edge, users may accidentally touch the display while operating the payment device.
For restaurant ordering and retail checkout systems, a compact interaction zone generally produces a smoother workflow: select, confirm, pay, collect receipt.
The hardware layout should follow that sequence.
Plan for Different Users, Not Just the Engineer Standing at the Prototype
A kiosk may be used by adults of different heights, wheelchair users, elderly customers, and people carrying bags or merchandise.
A terminal angle that seems comfortable during bench testing may become inconvenient after the kiosk is installed at its final height.
This is particularly important for wall-mounted systems because both the touchscreen and payment-terminal height are determined by installation position.
Before mass production, evaluate the prototype from actual customer positions rather than only reviewing CAD drawings.
Where accessibility standards apply to a specific project or market, the operator or system integrator should confirm the applicable reach, visibility, and interaction requirements during design.
Cable Routing Is Part of Payment Kiosk Hardware Design
Payment-terminal integration does not end at the mounting bracket.
The terminal may require:
- DC power
- USB
- USB-C
- Ethernet
- Serial communication
- Antenna connections
- Other terminal-specific interfaces
Actual connections vary by device. Some unattended payment terminals support several connectivity paths; for example, documented models may combine power, network, USB, and cellular components.
The internal cable path should therefore be designed before production.
Avoid routing terminal cables across printer doors, hinges, cooling fans, sharp sheet-metal edges, or removable service panels. Leave appropriate service slack, but do not allow excess cable to hang loosely inside the enclosure.
Cable clips, tie points, protective sleeves, or grommets can help keep the installation organized.
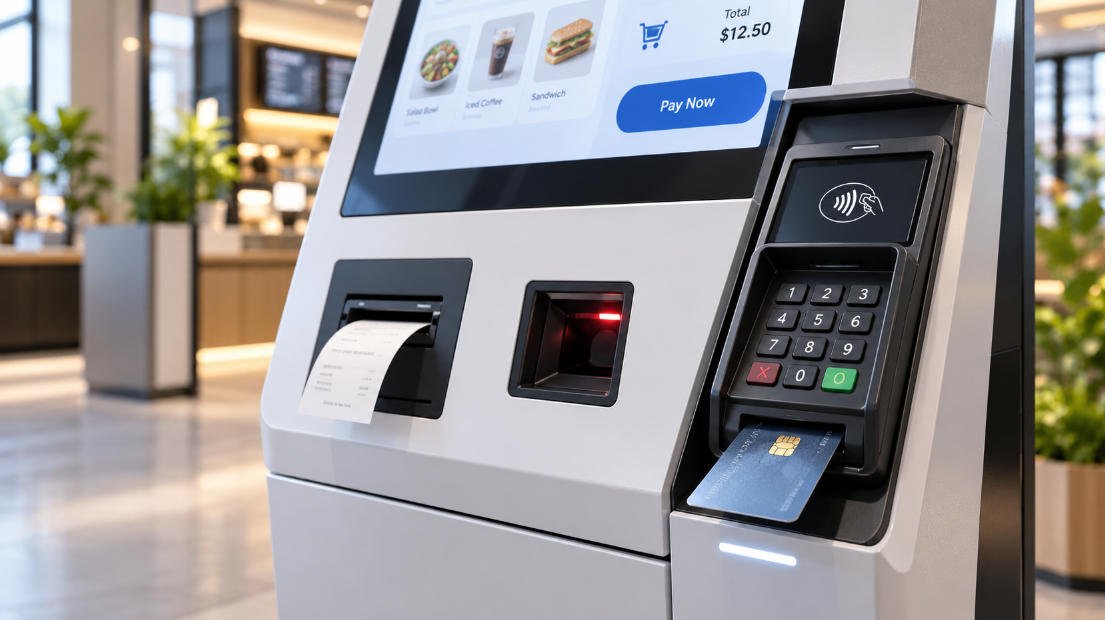
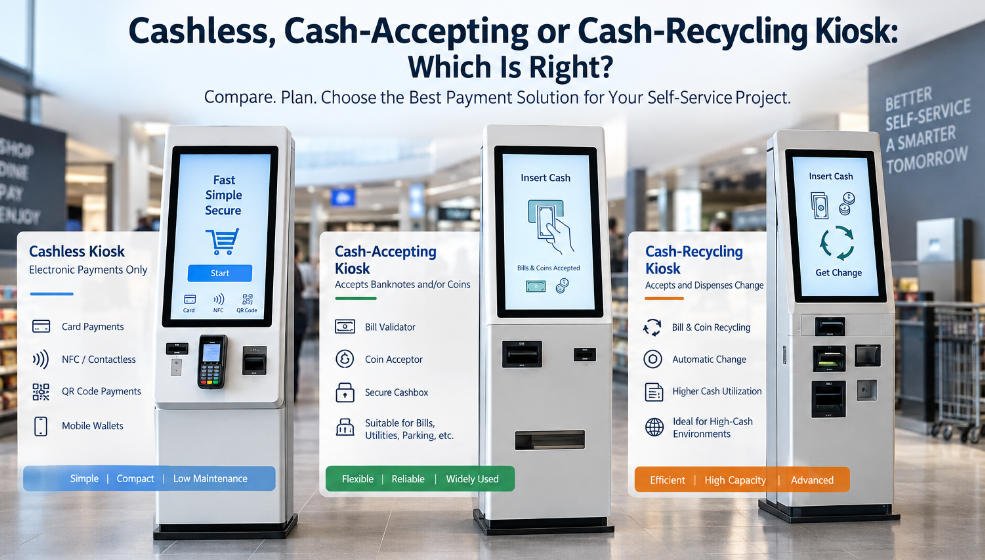
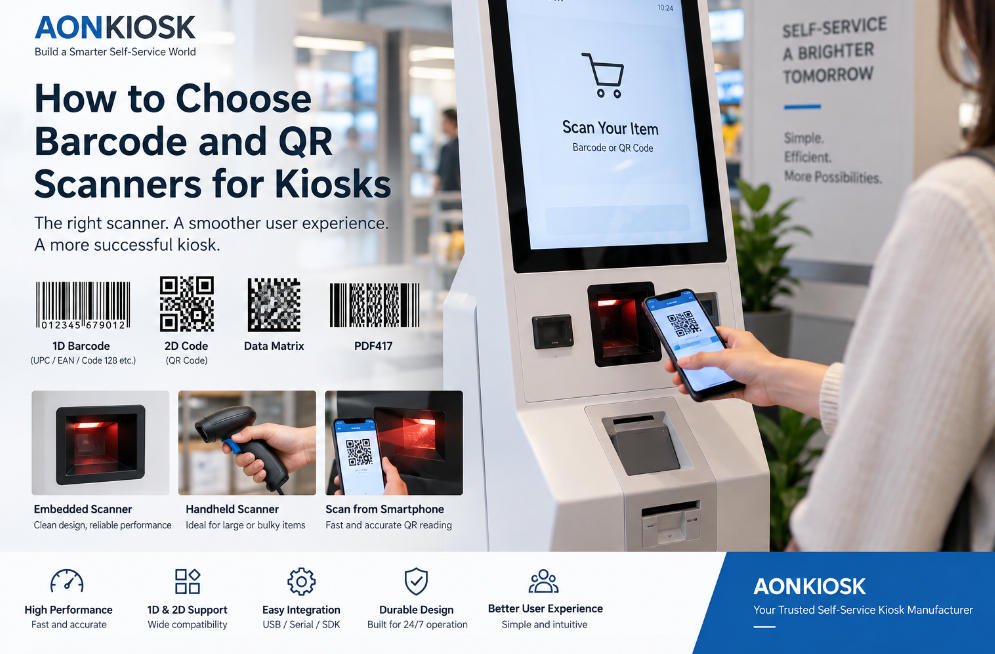
This becomes particularly important when a kiosk combines several types of payment kiosk hardware, such as a card terminal, receipt printer, barcode scanner, NFC reader, and industrial PC.
AONKIOSK’s Retail & Payment Kiosks are designed around configurable peripheral layouts, making it possible to plan these components as one hardware system rather than as unrelated accessories.
External Reader or Integrated NFC Module?
Not every project requires a conventional payment terminal.
Some kiosks use separate NFC, RFID, membership-card, or access-card readers. Others use a payment terminal with contactless functionality already built in.
These requirements should not be confused.
If your application needs loyalty-card identification, employee access, membership verification, or another non-payment card-reading function, a separate reader may still be required even when the payment terminal supports contactless payments.
The mechanical requirements can also differ.
Panel-mount NFC readers may sit behind or through a front panel, while payment terminals usually need dedicated structural mounting and service access.
For additional hardware-selection considerations, see AONKIOSK’s NFC & Card Reader Module for Self-Service Kiosks.
Think About Terminal Replacement Before Deployment
One of the most overlooked questions in kiosk payment terminal integration is:
How will this terminal be replaced three years from now?
Payment-device models change. Payment providers update supported equipment. Acquirers may specify a different terminal. Hardware can also fail in the field.
If the original reader is permanently trapped behind a welded structure or requires removing the touchscreen to reach its screws, every replacement becomes expensive.
A more maintainable design may use:
- A removable terminal mounting plate
- Rear-access screws
- A dedicated service door
- Plug-accessible connectors
- Modular brackets
- Replaceable front bezels
The best choice depends on the kiosk structure.
For a fleet of hundreds of machines, reducing a service procedure from thirty minutes to five minutes can matter far more than saving a small amount on the original bracket.
Avoid Assuming That Mounting a Certified Terminal Certifies the Entire Kiosk
Payment security responsibilities need to be defined carefully.
PCI SSC maintains the PTS Point of Interaction standard for devices used to protect PINs, account data, and other sensitive payment information, including unattended payment terminals. PCI SSC also encourages merchants and acquirers to use its approved-device listings when selecting relevant payment devices.
For kiosk buyers, the practical lesson is simple:
Do not modify a payment terminal or its installation method casually.
Follow the payment-terminal manufacturer’s installation instructions and confirm requirements with the payment provider, acquiring bank, software integrator, or certification partner responsible for the deployment.
A kiosk manufacturer can design the enclosure, opening, card reader bracket, internal supports, cable management, and peripheral integration, but payment certification responsibilities should be clearly assigned between all parties.
This distinction should be documented before production.
Who Should Supply the Payment Terminal?
There are two common procurement models.
The Kiosk Manufacturer Supplies the Terminal
This can simplify assembly when the model is commercially available to the manufacturer and acceptable for the target market.
However, buyers still need to confirm whether that terminal is supported by their payment processor or acquiring arrangement.
The Customer Supplies the Terminal
This is extremely common in international kiosk projects.
Payment hardware may be supplied directly by the customer, payment service provider, acquiring bank, or local system integrator.
In this case, the kiosk factory may only be responsible for mechanical and electrical integration.
AONKIOSK’s existing custom-kiosk procurement guidance recommends identifying peripherals by brand, model, interface, installation position, and responsibility for software integration rather than treating “payment terminal” as a generic quotation item.
For production planning, customer-supplied terminals should ideally be provided as physical samples before the final prototype is approved.
A Practical Integration Process
A reliable payment-terminal integration project usually follows a simple sequence:
- Confirm the target country and payment provider.
- Select the exact payment-terminal model.
- Obtain the manufacturer’s mechanical and installation drawings.
- Confirm how the terminal communicates with the kiosk system.
- Decide between surface, flush, or embedded mounting.
- Define payment-device position and user angle.
- Design the front opening and internal support structure.
- Plan power, communication, and network cable routing.
- Confirm maintenance and replacement access.
- Build a prototype using the real terminal.
- Test card insertion, contactless tapping, PIN entry, and cable access.
- Confirm payment-provider and certification responsibilities.
- Freeze the mechanical drawing before batch production.
Skipping steps three through ten is where many avoidable problems begin.
What to Send Your Kiosk Manufacturer
Before requesting a final quotation, prepare the following information:
- Payment terminal brand
- Exact model number
- Product datasheet
- Mechanical drawing
- Installation manual
- Preferred mounting location
- Required mounting angle
- Communication interface
- Power requirements
- Cable specifications
- Target deployment country
- Payment provider or acquiring bank
- Whether the device is customer-supplied
- Expected service-access method
- Prototype quantity
- Estimated production quantity
If the exact terminal has not yet been selected, say so. Designing a replaceable mounting plate is usually better than pretending the payment hardware has already been finalized.
Final Thoughts
Good kiosk payment terminal integration is largely invisible to the end user.
The terminal feels solid. The card slot is easy to reach. Contactless payment works from a natural position. The enclosure looks intentional rather than modified. Cables remain protected inside the kiosk, and technicians can replace the device without disassembling half the machine.
Achieving that result requires the payment terminal to be treated as a structural component from the beginning of the kiosk project.
The exact reader model, mounting geometry, card reader bracket, cable routing, service method, security requirements, and responsibility boundaries should all be confirmed before mass production.
For custom kiosk projects, AONKIOSK can design the payment kiosk hardware enclosure around customer-selected payment devices, scanners, printers, and related peripherals. The goal is not simply to create an opening large enough for the terminal—it is to build a kiosk structure that remains practical throughout installation, operation, maintenance, and future hardware changes.