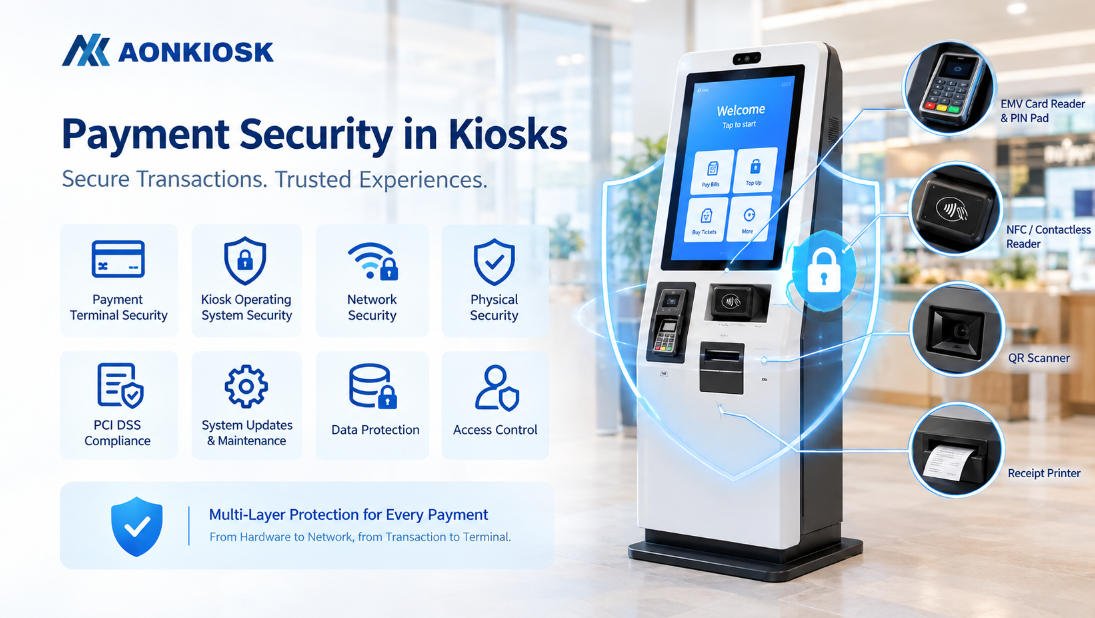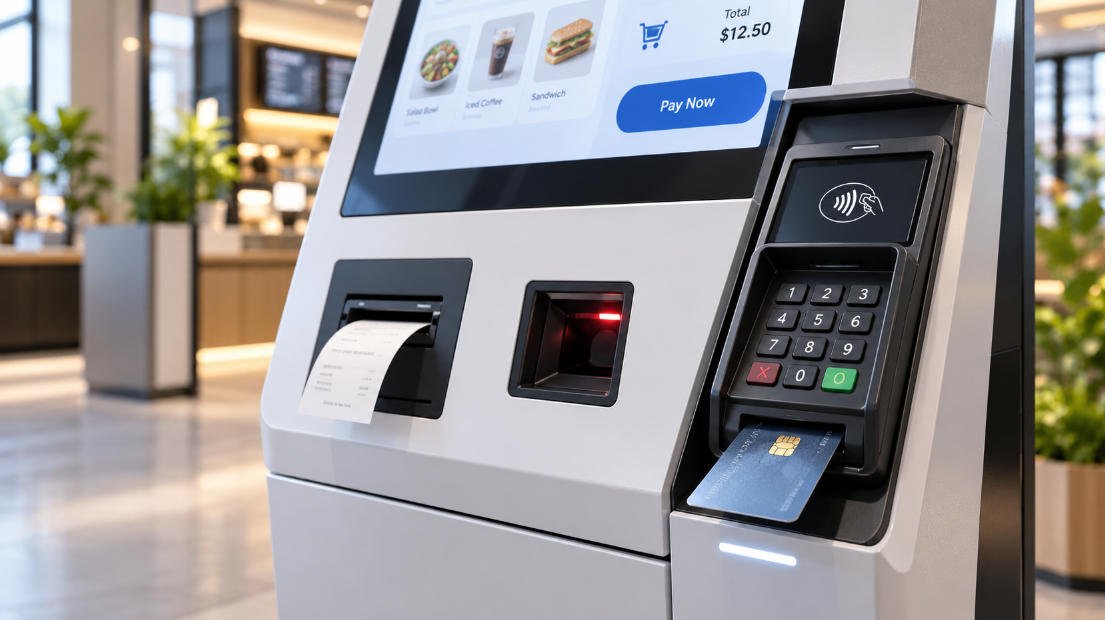






Un kiosque de bureau est un terminal en libre-service compact conçu pour être installé sur un comptoir, un bureau d'accueil, une table de service, un poste de caisse ou toute autre surface de travail existante. Il est également couramment appelé kiosque de comptoir, kiosque de table ou kiosque en libre-service de bureau.
Contrairement à un kiosque au sol, un kiosque de bureau ne nécessite ni enceinte pleine hauteur ni grande empreinte au sol. Il intègre néanmoins les systèmes essentiels d'un terminal en libre-service commercial, notamment un écran tactile, un ordinateur industriel, un système d'alimentation, une connexion réseau et des périphériques spécifiques à l'application.
Les kiosques de bureau sont couramment utilisés pour :
- L'enregistrement des clients
- L'enregistrement des visiteurs
- La commande de repas
- La collecte des billets
- L'impression de tickets d'attente
- Le paiement au détail
- Les services d'adhésion
- Enregistrement des patients
- Consultation d’informations
- La soumission de formulaires
- La vérification de codes QR
- Libre-service employé
Bien que l'enceinte soit plus petite, les exigences techniques ne sont pas nécessairement plus simples. L'espace interne limité rend l'agencement des composants, la gestion thermique, le cheminement des câbles et l'accès pour la maintenance particulièrement importants.
Ce guide explique la structure d'un kiosque de bureau, la fonction de chaque composant, les exigences d'installation, les méthodes de configuration et les procédures courantes de dépannage.
1. Qu'est-ce qu'un kiosque de bureau ?
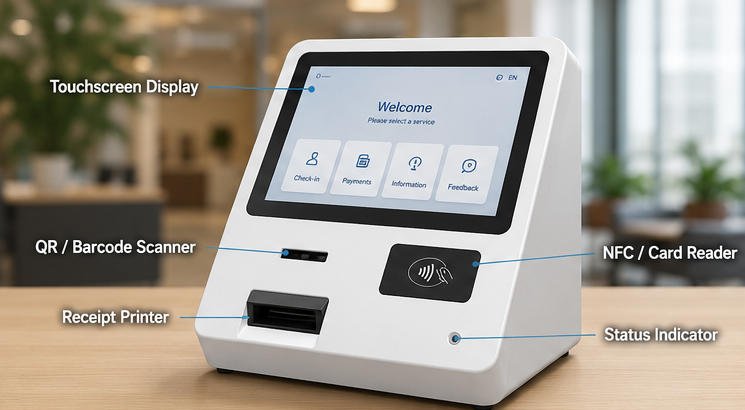
Un kiosque de bureau est un terminal interactif compact soutenu par un comptoir ou une table existant plutôt que par son propre piédestal monté au sol.
Un système typique comprend :
- Enceinte en métal ou moulée
- Écran tactile
- PC industriel ou carte mère intégrée
- Alimentation électrique
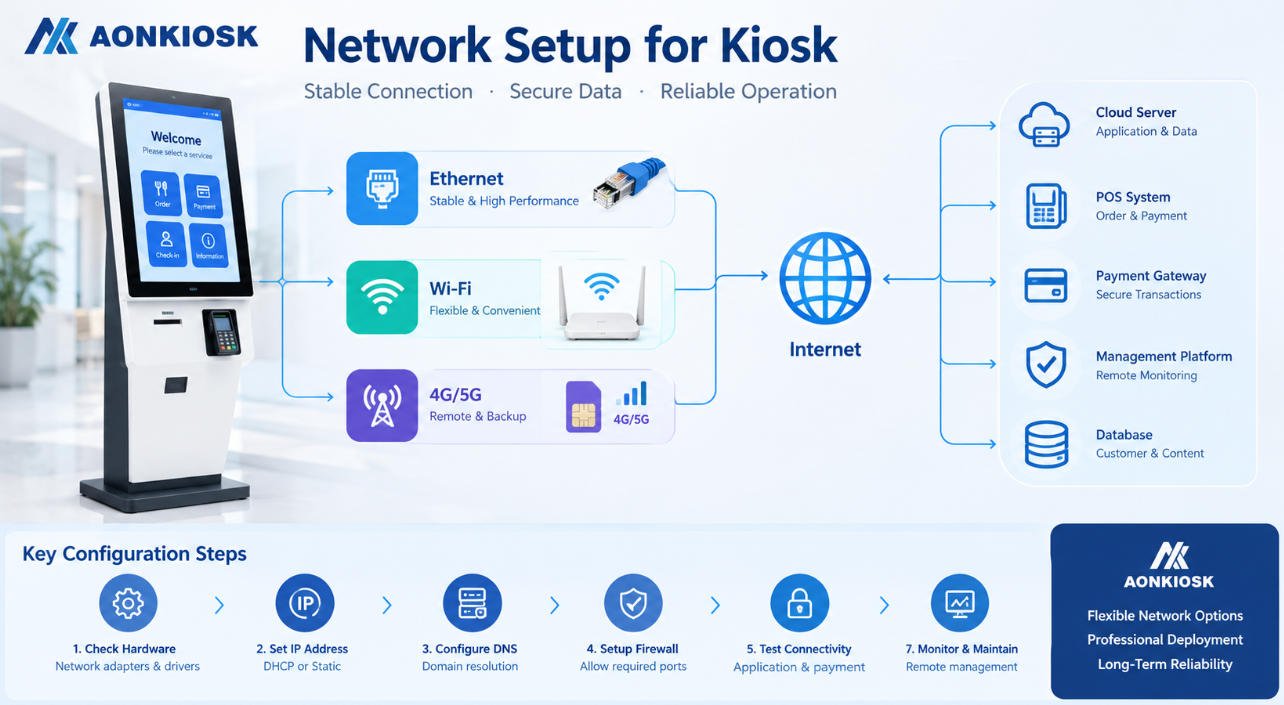
- Module réseau
- Câblage interne
- Base de montage
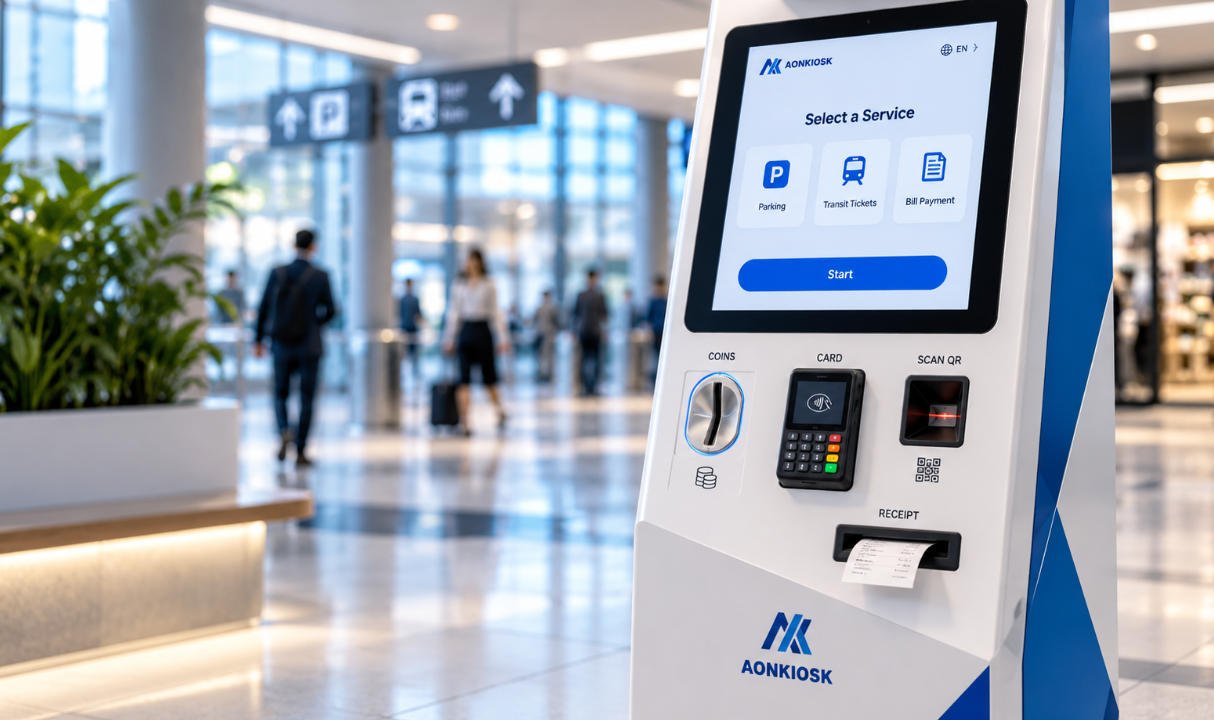
- Scanner, imprimante, lecteur de carte ou dispositif de paiement en option
L'application du kiosque détermine les modules périphériques requis. Un kiosque d'enregistrement de visiteurs peut utiliser une caméra, un lecteur de pièce d'identité et une imprimante de badges, tandis qu'un kiosque de commande en restauration peut nécessiter une imprimante de reçus, un scanner QR et un terminal de paiement.
Pour une explication plus complète de l'architecture des kiosques, consultez le guide d'AONKIOSK. principaux composants d'une borne libre-service Guide.
Les kiosques de bureau sont généralement choisis lorsque le site d'installation dispose déjà d'un comptoir stable et que le projet ne nécessite pas d'armoire autoportante. Leur structure compacte permet de réduire l'espace occupé, de simplifier le transport et de positionner le terminal à proximité du personnel lorsqu'une assistance ponctuelle est requise.
2. Agencement structurel du kiosque de bureau
L'agencement interne d'un kiosque de bureau doit équilibrer quatre exigences :
- L'accessibilité pour l'utilisateur
- Compatibilité des composants
- Dissipation de la chaleur
- Accès de maintenance
Une structure simplifiée est présentée ci-dessous :
Enceinte du kiosque de bureau
L'écran est généralement positionné à l'avant de l'enceinte. Les composants informatiques et d'alimentation sont installés derrière ou sous l'écran. Les dispositifs fréquemment utilisés, tels que les scanners QR et les lecteurs NFC, sont placés à portée naturelle de l'utilisateur et dans son champ de vision.
Les modules plus volumineux, en particulier les imprimantes de reçus et les terminaux de paiement, nécessitent des supports de fixation dédiés. Leur emplacement doit permettre le chargement du papier, l'insertion de cartes, le paiement sans contact et le nettoyage de routine sans retirer l'ensemble du kiosque du comptoir.
3. Enceinte et châssis mécanique
L'enceinte constitue la base structurelle du kiosque de bureau. Elle protège les composants électroniques, soutient l'écran et les périphériques, et transmet les forces opérationnelles au plan de travail.
Les matériaux d'enceinte courants comprennent :
- Acier laminé à froid
- Acier inoxydable
- Alliage d’aluminium
- Plastique technique ABS
- Verre trempé
- Assemblages mixtes métal et plastique
L'acier laminé à froid est largement utilisé car il offre une bonne rigidité, une flexibilité de fabrication et un contrôle des coûts. L'aluminium peut réduire le poids et améliorer la résistance à la corrosion, tandis que l'acier inoxydable peut être sélectionné pour les environnements de soins de santé, de restauration ou corrosifs.
Une comparaison détaillée est disponible dans le guide des matériaux d'enceinte de kiosque d'AONKIOSK. Guide des matériaux d'enceinte de kiosque.
Caractéristiques structurelles
Une enceinte de kiosque de bureau correctement conçue doit offrir :
- Une résistance suffisante aux forces de pression sur l'écran
- Un support stable lors de l'insertion de cartes et du retrait du papier
- Des bords externes arrondis ou protégés
- Un accès contrôlé aux composants électroniques internes
- Des ouvertures précises pour les scanners et les dispositifs de paiement
- Chemins de ventilation n'exposant pas les composants critiques
- Panneaux de service amovibles
- Points de mise à la terre internes
- Dispositifs de décharge de traction pour câbles
- Fixations inviolables là où elles sont requises
L'épaisseur de la tôle doit être déterminée en fonction des dimensions de l'enceinte, du poids de l'écran, de la méthode de montage et de l'usage public attendu. L'augmentation de l'épaisseur du matériau à elle seule ne garantit pas la stabilité. Les bords pliés, les nervures de renfort, les supports soudés et la géométrie de la base sont tout aussi importants.
Finition de surface
Le revêtement par poudre est couramment utilisé sur les enceintes en acier car il crée une surface externe durable et uniforme. Le processus de revêtement doit inclure un nettoyage approprié, un prétraitement et une polymérisation afin de réduire le décollement et la corrosion.
Les options de personnalisation courantes comprennent :
- Couleurs RAL personnalisées
- Instructions sérigraphiées
- Logos découpés au laser
- Marques de marque éclairées
- Graphiques vinyle
- Finitions anti-traces de doigts
- Panneaux en acier inoxydable brossé
La conception de la surface ne doit pas obstruer les ouvertures de ventilation ni interférer avec les capteurs, les antennes et les zones de paiement sans contact.
4. Assemblage de l'écran tactile
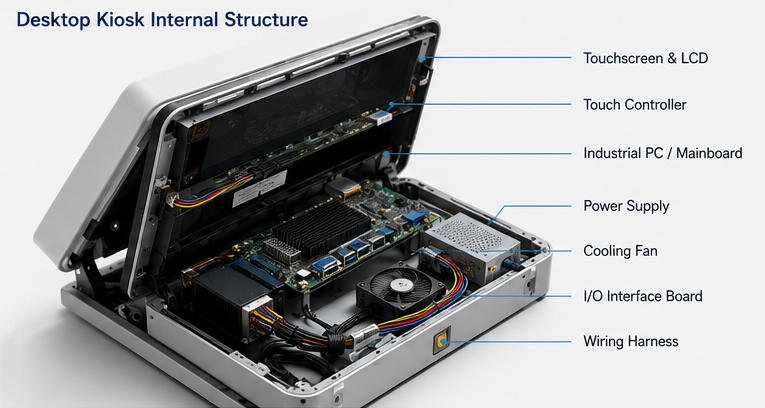
L'écran tactile constitue l'interface utilisateur principale. Il combine généralement :
- Panneau LCD
- Rétroéclairage LED
- Capteur tactile
- Verre de protection
- Contrôleur tactile
- Câble vidéo
- Câble tactile USB ou série
- Cadre de montage
Les tailles d'écran courantes pour les bornes de bureau varient d'environ 10 à 24 pouces, bien que la taille appropriée dépende de l'interface logicielle, de la distance de visualisation et de l'espace disponible sur le comptoir.
La technologie tactile capacitive projetée, ou PCAP, est fréquemment utilisée car elle prend en charge une opération tactile réactive au doigt, les gestes multi-touch et une surface en verre plat. D'autres technologies peuvent être appropriées dans des environnements impliquant des gants, de la contamination ou des exigences de saisie spécialisées.
La gamme de kiosques Explication des types d'écrans tactiles Ce guide fournit une comparaison plus détaillée des technologies PCAP, résistives, infrarouges et autres technologies tactiles.
Exigences d'installation de l'écran
L'assemblage de l'écran doit être monté sans pression inégale sur le panneau LCD. Une pression excessive du cadre peut provoquer :
- Fuite de lumière
- Distorsion de l'affichage
- Instabilité tactile
- Contrainte sur le verre
- Défaillance prématurée du panneau
Le verre de protection doit être soutenu par un cadre ou un système adhésif approprié. Le choix de l'adhésif doit tenir compte de la température, des produits chimiques de nettoyage et de l'expansion à long terme du matériau.
L'angle de visualisation doit également correspondre à la hauteur d'installation prévue. Une borne placée sur un comptoir d'accueil élevé peut nécessiter un angle d'écran différent de celui d'une borne installée sur un bureau de service en position assise.
Dépannage de l'écran tactile
Si l'image est visible mais que la saisie tactile ne fonctionne pas :
- Vérifiez le câble tactile USB ou série.
- Confirmez que le contrôleur tactile apparaît dans le système d'exploitation.
- Redémarrez l'application de la borne.
- Réinstallez ou mettez à jour le pilote tactile si nécessaire.
- Testez les problèmes de mise à la terre ou de bruit électrique.
- Inspectez le verre de protection pour détecter toute pression exercée par l'enceinte.
- Recalibrez le panneau tactile lorsque la technologie l'exige.
Si le point tactile est décalé, confirmez d'abord que la résolution et l'orientation de l'affichage correspondent aux paramètres du contrôleur tactile.
5. PC industriel ou carte mère embarquée
Le système informatique exécute le système d'exploitation, l'application de kiosque et les pilotes périphériques. Il gère également la communication avec les plateformes cloud, les systèmes POS, les bases de données ou les serveurs locaux.
Un kiosque de bureau peut utiliser :
- PC industriel de type boîtier
- PC embarqué sans ventilateur
- Carte mère Android intégrée
- Carte mère embarquée compatible Windows
- Architecture PC panneau
- Ordinateur monocarte pour applications limitées
La plateforme appropriée doit être sélectionnée en fonction de la compatibilité logicielle plutôt que des seules spécifications du processeur.
Les facteurs de sélection importants incluent :
- Le système d’exploitation
- Performance du processeur
- Capacité mémoire
- Endurance du stockage
- Nombre de ports USB
- Exigences RS232 ou RS485
- Prise en charge Ethernet et Wi-Fi
- Sorties d'affichage
- Disponibilité des pilotes
- Récupération automatique de l'alimentation
- Prise en charge du chien de garde
- Température de fonctionnement
- Disponibilité à long terme des composants
Pour des conseils détaillés de sélection et de maintenance, voir PC industriel dans un kiosque.
Planification des ports
Les kiosques de bureau intègrent souvent plusieurs périphériques USB. Une configuration typique peut utiliser des ports séparés pour :
- Contrôleur tactile
- Scanner QR
- Imprimante de reçus
- Caméra
- Lecteur NFC
- Dispositif de paiement
- Clavier de service
- Adaptateur Wi-Fi ou Bluetooth
L'utilisation d'un concentrateur USB interne non planifié peut créer des problèmes d'alimentation et de communication. L'équipe d'ingénierie doit calculer la demande totale de courant et vérifier si les dispositifs à haute intensité nécessitent une alimentation indépendante.
Les connecteurs USB doivent être sécurisés contre les vibrations et les déconnexions accidentelles. Des câbles USB verrouillables, des attaches de câbles ou des supports de retenue internes peuvent être utilisés pour les dispositifs critiques.
6. Alimentation électrique et conception électrique
Le système d'alimentation convertit la tension d'entrée du site en tensions requises par l'écran, l'ordinateur et les périphériques.
Selon la configuration du kiosque, il peut inclure :
- Prise d'entrée CA
- Interrupteur principal d'alimentation
- Fusible
- Filtre CEM
- Alimentation CA-CC
- Panneau de distribution CC
- Convertisseur de tension
- Câble de mise à la terre
- Protection contre les surtensions
- Alimentation sans interruption
Certains kiosques de bureau utilisent un adaptateur d'alimentation externe pour réduire la chaleur interne et gagner de l'espace. D'autres utilisent une alimentation interne fermée pour une installation plus propre et une gestion centralisée des câbles.
L'architecture d'alimentation doit être basée sur la charge simultanée maximale plutôt que sur la consommation moyenne. Les imprimantes de reçus, les distributeurs de cartes et les dispositifs à moteur peuvent consommer nettement plus de courant en fonctionnement qu'au repos.
Sécurité électrique
Le boîtier doit être correctement mis à la terre lorsque des pièces métalliques conductrices sont accessibles. Le câblage CA interne doit être séparé des câbles de signaux basse tension lorsque cela est possible.
Les contrôles de conception recommandés incluent :
- Bornes CA isolées
- Capots de protection sur les connexions sous tension
- Calibre de fil correct
- Détente de traction aux points d’entrée des câbles
- Entrée protégée par fusible
- Points de mise à la terre clairement identifiés
- Borniers de connexion sécurisés
- Espace libre adéquat autour des composants d’alimentation
Lorsqu’un kiosque redémarre pendant une impression ou un paiement, une capacité d’alimentation insuffisante ou une tension instable doit être vérifiée avant de remplacer l’ordinateur.
7. Lecteur de code QR et de code-barres
Les lecteurs de code QR et de code-barres sont courants dans les kiosques de bureau car ils prennent en charge des flux de travail compacts et sans contact.
Ils peuvent être utilisés pour lire :
- Les codes de paiement mobile
- Confirmations de réservation
- Les billets électroniques
- Les codes de fidélité
- Les codes-barres de produits
- Les invitations de visiteurs
- Les codes de rendez-vous patients
- Les identifiants des employés
Le lecteur peut communiquer via des interfaces USB, RS232 ou COM virtuelles.
Conception de la fenêtre du lecteur
Les performances du lecteur dépendent de plus que le module du lecteur lui-même. La fenêtre avant doit offrir :
- Une transparence optique correcte
- Une distance appropriée par rapport au lecteur
- Une réflexion minimale
- Une protection contre les rayures
- Un angle de numérisation dégagé
- Une exposition contrôlée à la lumière ambiante
Les fenêtres fumées sombres peuvent améliorer l’apparence du kiosque mais peuvent réduire les performances de numérisation si la transmission optique est trop faible.
Dépannage du lecteur
Si le lecteur s’allume mais ne lit pas les codes :
- Nettoyez la fenêtre du lecteur.
- Testez un code-barres valide connu.
- Augmentez la luminosité de l’écran du téléphone.
- Confirmez que le type de code est activé.
- Vérifiez la distance de lecture du lecteur.
- Vérifiez la communication USB ou série.
- Testez le lecteur à l’extérieur de l’ouverture du kiosque.
- Inspectez la fenêtre avant pour détecter tout reflet ou teinte excessive.
Si le lecteur lit correctement dans un utilitaire de test mais pas dans le logiciel du kiosque, vérifiez le mode de sortie, les paramètres du port COM et le format des données.
8. Lecteur NFC, lecteur de carte et terminal de paiement
Les kiosques de bureau peuvent intégrer des lecteurs NFC, des lecteurs de piste magnétique, des lecteurs de carte à puce ou des terminaux de paiement complets.
Un lecteur NFC peut prendre en charge :
- Identification de membre
- Les cartes d’employé
- Les identifiants d’accès
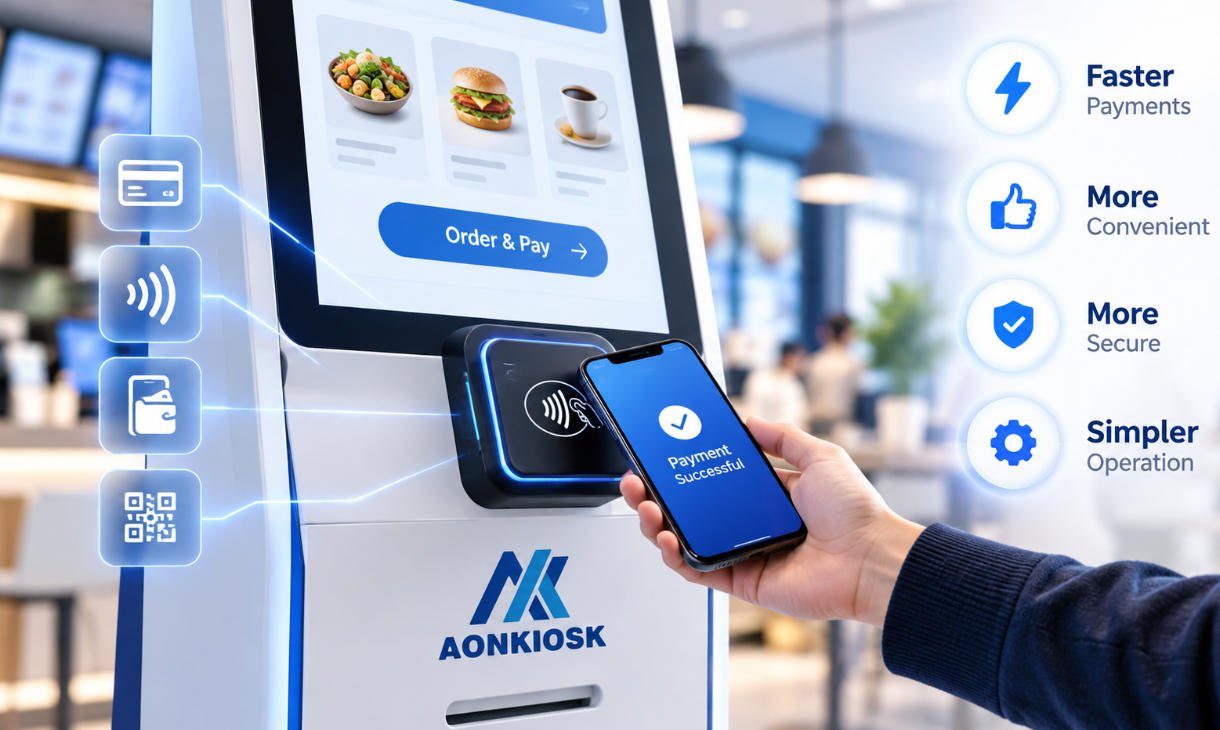
- Des paiements sans contact
- Les cartes de fidélité
- Cartes de campus
- Les cartes de transport public
L’emplacement de l’antenne est critique. Les panneaux métalliques positionnés directement autour ou derrière une antenne NFC peuvent réduire la distance de lecture. Une fenêtre de lecture non métallique ou un dégagement d’antenne correctement conçu peut être nécessaire.
Pour des conseils d’intégration supplémentaires, reportez-vous à AONKIOSK’s guide des modules de lecteur NFC et de carte.
Les terminaux de paiement peuvent être fournis par le client car les approbations d’appareils, les banques acquéreuses et les certifications de paiement varient selon les pays. Le fabricant du kiosque doit confirmer :
- Le modèle du terminal
- Les dimensions physiques
- Position de sortie du câble
- Configuration des trous de montage
- Emplacement de l'antenne sans contact
- Direction d’insertion de la carte
- Angle d'insertion du code PIN
- Méthode de retrait pour maintenance
La gamme de kiosques Les bornes hôtelières impliquent souvent une intégration de périphériques plus complexe. Les modules typiques incluent des scanners de passeports ou de pièces d'identité, des terminaux de paiement par carte, des encodeurs de cartes RFID, des distributeurs de cartes, des imprimantes de tickets, des caméras et des dispositifs de consultation de réservations. Démontrer comment les scanners, imprimantes et composants de paiement peuvent être intégrés dans des plateformes matérielles en libre-service.
9. Intégration de l'imprimante de reçus
Un kiosque de bureau peut utiliser une imprimante thermique compacte pour reçus afin de générer des confirmations de commande, des numéros de file d'attente, des tickets ou des relevés de transactions.
L'installation de l'imprimante doit permettre l'accès pour :
- Le remplacement du rouleau de papier
- Le nettoyage de la tête d'impression
- Retrait des bourrages
- L'inspection du dispositif de coupe
- Le remplacement des câbles
La sortie papier doit être alignée avec précision sur le présentateur de l'imprimante. Un mauvais alignement peut provoquer un enroulement, une déchirure ou un bourrage du papier à l'intérieur du boîtier.
Facteurs de sélection de l'imprimante
Les paramètres importants comprennent :
- Largeur du papier
- Le diamètre du rouleau
- La vitesse d'impression
- Le type de dispositif de coupe
- L'exigence de présentateur ou de rétracteur
- L’interface USB ou série
- La compatibilité des pilotes
- Capteur de papier faible
- Le capteur de fin de papier
- La tension de fonctionnement
- Le courant maximal
Un petit kiosque ne doit pas utiliser le plus grand rouleau de papier possible sans tenir compte du poids, de l'accès de maintenance et de la chaleur. La capacité de rouleau requise doit être basée sur les transactions quotidiennes prévues et la fréquence de maintenance.
Dépannage de l'imprimante
Si l'imprimante n'imprime pas :
- Vérifiez l'alimentation électrique et les indicateurs d'état.
- Confirmez que le papier est installé correctement.
- Inspectez le dispositif de coupe et recherchez les bourrages papier.
- Vérifiez que l'imprimante sélectionnée est correcte dans le logiciel.
- Effectuez un test à partir du système d'exploitation.
- Vérifiez les connexions USB ou série.
- Confirmez que le pilote approprié est installé.
- Examinez les journaux d'application et d'imprimante.
Des impressions partielles répétées ou des redémarrages du kiosque peuvent indiquer une alimentation électrique sous-dimensionnée.
10. Gestion thermique
Les kiosques de bureau disposent d'un volume d'air interne limité. La chaleur générée par l'écran LCD, l'ordinateur, l'alimentation électrique et l'imprimante peut s'accumuler rapidement, en particulier lorsque les ouvertures de ventilation sont obstruées par un mur ou une cloison de comptoir.
Les méthodes de gestion thermique comprennent :
- La convection naturelle
- Les fentes de ventilation
- Des ventilateurs de circulation interne
- Dissipateurs thermiques
- Les PC industriels sans ventilateur
- Les adaptateurs d'alimentation externes
- La séparation des composants générateurs de chaleur
- Des ventilateurs à contrôle de température
Les ouvertures de ventilation doivent être positionnées de manière à soutenir un chemin de circulation d'air défini. Des trous aléatoires ne garantissent pas un refroidissement efficace.
Les ouvertures d'admission d'air ne doivent pas être orientées vers des zones où des liquides, des particules alimentaires ou des sprays de nettoyage sont susceptibles de pénétrer. Les ventilateurs doivent également rester accessibles pour leur remplacement et leur nettoyage.
La validation thermique doit être effectuée avec :
- Le kiosque entièrement assemblé
- L'application en cours d'exécution
- Tous les périphériques connectés
- Le fonctionnement de l'imprimante
- La température ambiante attendue
- Les dégagements de ventilation conformes au site d'installation
Les températures des composants doivent être vérifiées après que le kiosque atteint la stabilité thermique.
11. Montage sur comptoir et installation
Un kiosque de bureau doit rester stable lors d'opérations tactiles répétées, de l'insertion de cartes et de l'entretien de l'imprimante.
Les méthodes de montage courantes comprennent :
- Base lestée autonome
- Montage sur comptoir par boulonnage
- Support de montage VESA
- Montage par pince
- Base rotative
- Fixations inférieures dissimulées
- Câble de sécurité
Une unité autonome est plus facile à repositionner mais peut se déplacer lorsque les utilisateurs appuient sur l'écran. Les installations publiques permanentes bénéficient généralement d'une fixation mécanique.
Avant l'installation, confirmer :
- La capacité de charge du comptoir
- La zone de montage disponible
- L'épaisseur du comptoir
- L'emplacement d'entrée des câbles
- La hauteur de vision de l'utilisateur
- Exigences d'accessibilité
- L'espace dégagé derrière le kiosque
- L'espace d'entretien de l'imprimante
- Portée du terminal de paiement
- La disponibilité du réseau et de l'alimentation électrique
Les câbles doivent passer par une ouverture protégée du comptoir ou un canal arrière pour câbles. Les câbles d'alimentation et de données exposés créent des risques de déconnexion, de sécurité et de falsification.
12. Accès de maintenance et conception pour l'entretien
La compacité ne doit pas empêcher la maintenance de routine. Un technicien doit pouvoir accéder aux éléments couramment entretenus sans démonter entièrement l'enceinte d'affichage.
Les panneaux de service peuvent utiliser :
- Accès par clé et serrure
- Vis de sécurité
- Vis dissimulées
- Capots arrière à charnières
- Plaques inférieures amovibles
- Supports d'imprimante coulissants
Les composants fréquemment entretenus doivent rester proches de l'ouverture d'accès. Ceux-ci comprennent normalement :
- Imprimante de reçus
- Rouleau de papier
- L'interrupteur d'alimentation
- Fusible
- PC industriel
- Le lecteur de stockage
- Le concentrateur USB
- Le routeur réseau
- Le ventilateur de refroidissement
Les câbles internes doivent être étiquetés aux deux extrémités. Un schéma de câblage doit être conservé pour la production, le support technique et les réparations sur site.
AONKIOSK applique des procédures de contrôle qualité à l'entrée, en cours de processus et en fin de production pour la fabrication des kiosques, y compris l'inspection des composants, les vérifications d'assemblage et les tests fonctionnels. De plus amples informations sont disponibles sur la page qualité et certifications .
13. Problèmes courants des kiosques de bureau
La borne ne s'allume pas
Vérifier :
- Prise murale
- Adaptateur externe
- Interrupteur principal
- Fusible d'entrée
- Câble CA
- Connexion d'alimentation CC
- Câblage du bouton d'alimentation
- Indicateurs d'état du PC industriel
Déconnectez les périphériques optionnels et testez le système de base. Un périphérique défectueux peut surcharger l'alimentation électrique.
Le kiosque bouge pendant l'utilisation
Les causes possibles incluent :
- Base trop petite
- Poids insuffisant
- Vis de fixation desserrées
- Plan de travail flexible
- Angle d'écran générant un effet de levier excessif
- Patins antidérapants manquants
Utilisez une base plus grande ou fixez le kiosque directement au comptoir.
Les périphériques USB se déconnectent par intermittence
Vérifier :
- Connecteurs desserrés
- Longueur excessive du câble USB
- Concentrateurs USB non alimentés
- Courant USB insuffisant
- Interférences électromagnétiques
- Ports endommagés
- Paramètres d'économie d'énergie du système d'exploitation
Les périphériques critiques ne doivent pas dépendre de câbles de rallonge de faible qualité.
Le kiosque devient chaud
Vérifier :
- Évents obstrués
- Ventilateur en panne
- La lumière ambiante vive
- Charge CPU élevée
- Chaleur de l'imprimante
- Température de l'alimentation électrique
- Dégagement par rapport aux murs
- Température ambiante de la pièce
N'ajoutez pas de ventilateur sans déterminer la direction prévue du flux d'air.
L'écran est vide mais l'ordinateur fonctionne
Vérifier :
- Alimentation de l'écran
- Câble HDMI ou DisplayPort
- Entrée vidéo sélectionnée
- État du rétroéclairage
- Paramètres d'affichage du système d'exploitation
- Sortie vidéo de la carte mère
Testez avec un moniteur externe pour distinguer les pannes de l'ordinateur de celles de l'écran.
14. Liste de vérification pour la sélection d'un kiosque de bureau
Avant de commander ou de personnaliser un kiosque de bureau, confirmez les informations suivantes.
L'application
- Quelle tâche l'utilisateur devra-t-il effectuer ?
- Combien de temps dure une transaction ?
- Une assistance du personnel sera-t-elle disponible ?
- L'impression est-elle requise ?
- Un paiement est-il requis ?
- Quel système backend doit être connecté ?
Matériel
- Taille d'écran requise
- Le système d’exploitation
- Processeur et mémoire
- Type de scanner
- Lecteur NFC ou carte
- Modèle de terminal de paiement
- Capacité du papier de l'imprimante
- Caméra ou microphone
- Méthode de connexion réseau
Conception mécanique
- Dimensions maximales
- Hauteur du comptoir
- La méthode de montage
- Angle de l'écran
- Direction d'accès pour la maintenance
- Position du câble d’entrée
- Couleur de la marque et logo
- Niveau de sécurité requis
Environnement
- Température intérieure
- Exposition à la poussière
- Méthode de nettoyage
- Exposition aux aliments ou aux liquides
- Emplacement public ou supervisé
- Heures de fonctionnement prévues
- Exigences d'accessibilité
Assistance
- Plan de pièces de rechange
- Méthode de diagnostic à distance
- Récupération du système d'exploitation
- Package de pilotes
- Schéma de câblage
- Manuel de maintenance
- Procédure de garantie
15. Borne de comptoir vs Borne au sol
Une borne de comptoir est généralement appropriée lorsque :
- Un espace de comptoir existe déjà
- L’installation doit rester compacte
- Les exigences en périphériques sont limitées
- Le personnel se trouve à proximité
- La borne peut devoir être déplacée
- Le perçage du sol n’est pas autorisé
Une borne au sol est généralement plus adaptée lorsque :
- Aucun comptoir n’est disponible
- Un écran plus grand est requis
- De nombreux périphériques doivent être intégrés
- De grands rouleaux de papier ou des modules de caisse sont nécessaires
- L’espace d’extension interne est important
- Le terminal doit fonctionner comme un point de service autonome visible
Le choix doit être basé sur le flux de travail complet plutôt que sur l’apparence seule. Une enceinte de comptoir peut devenir difficile à maintenir si trop de modules sont forcés dans un petit volume interne.
Conclusion
Une borne de comptoir est un système libre-service commercial complet dans une enceinte compacte. Sa structure doit supporter l’écran tactile, la plateforme informatique, l’alimentation électrique, la connexion réseau et les périphériques requis tout en restant stable sur un comptoir existant.
Une conception fiable de borne de comptoir repose sur une ingénierie mécanique, électrique et thermique coordonnée. Les considérations les plus importantes incluent la disposition des composants, l’angle de l’écran, la stabilité du montage, la capacité d’alimentation, la ventilation, la retenue des câbles et l’accès à la maintenance.
Pour les flux simples d’enregistrement, de commande, de vérification, de paiement et d’information, une borne de comptoir bien conçue peut offrir la fonctionnalité d’un terminal libre-service plus grand tout en occupant nettement moins d’espace d’installation.
AONKIOSK fournit du matériel de borne personnalisable de comptoir, sur plan de travail, mural et au sol pour différentes applications commerciales. Les options de configuration incluent les écrans tactiles, les PC industriels, les lecteurs de codes QR, les lecteurs NFC, les imprimantes de reçus, les caméras et les supports de terminal de paiement. De plus amples informations sur le développement de matériel personnalisé sont disponibles via AONKIOSK. services de fabrication de bornes en OEM et ODM.